Step-by-step instructions on how to independently obtain a tourist visa to the Netherlands. What documents to prepare, the cost of a visa, useful addresses, details of registration and reasons for refusals.
What kind of visa is needed
To enjoy the Dutch sights, you need to obtain a Schengen C visa. Single entry and multiple entry visas to the Netherlands are issued at consulates and through intermediaries - accredited visa centers.
Step 1: Book your tickets
Where can I find cheap tickets? Use the search engines Aviasales and Skyscanner to compare prices of all airlines. Find out the secrets of finding cheap flights.
To confirm the travel itinerary within the country, you need to provide copies of roundtrip tickets or reservations. Unpaid reservations are eligible for a short stay visa.
It's not worth drawing a document in Photoshop. Falsification is easily detected, and the offender will be blacklisted. Some tourists use the services of intermediary firms that keep air tickets for the entire duration of the processing of documents by the embassy.
Step 2: Book your accommodation
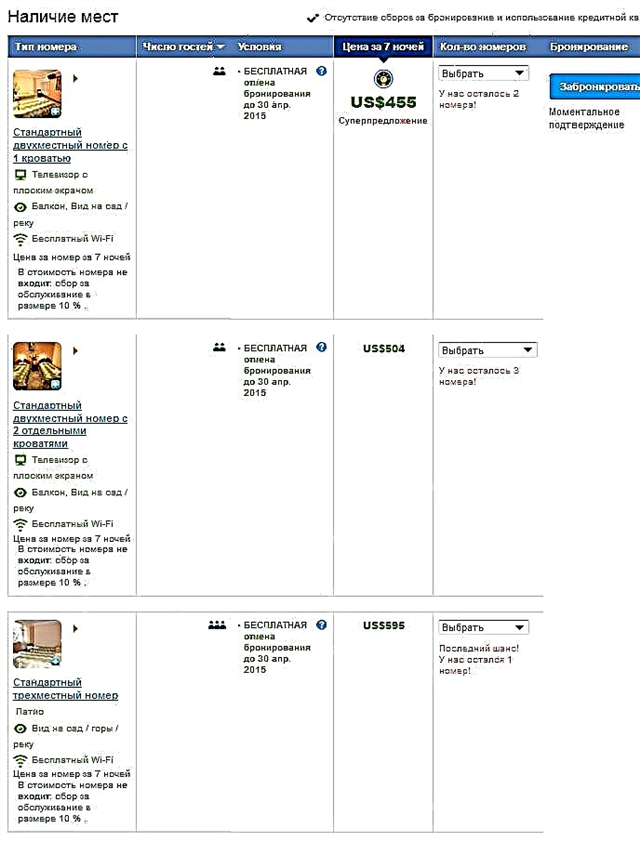
To obtain a visa to the Netherlands, attach your hotel reservation for the entire trip, including visits to other countries. When booking for Booking or Rumguru, be sure to indicate all participants in the trip. It is important that the names of tourists in the booking confirmation are written in Latin letters.
When booking an apartment, you are asked to include a receipt for payment and a rental agreement in the package of documents for a visa to the Netherlands. It's convenient to book private accommodations on Airbnb. You choose an apartment or a room, include your fellow travelers in the travel plan, pay, print out the confirmation and attach it to your visa application.
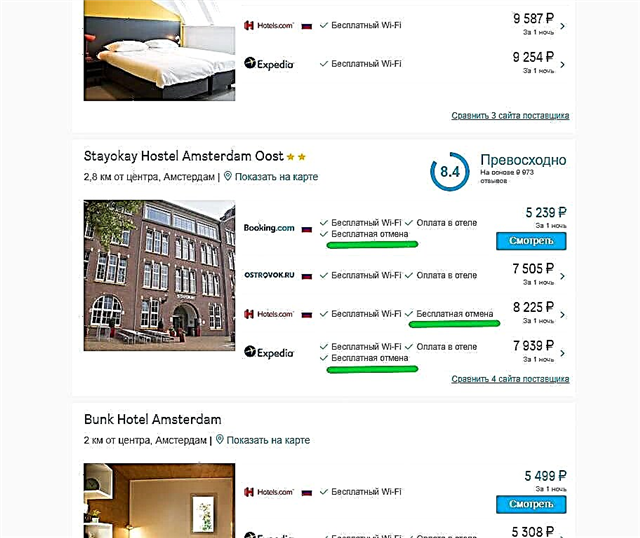
How to insure yourself with the hotel if a visa is refused? We advise you to look for hotels with free cancellation or those that charge on check-in.

Step 3: make copies of passports
To obtain a visa to the Netherlands, make a copy of your passport - a spread with a photo and full name, as well as closed Schengen visas. Copy the same spreads from your old passport. Remove copies of all completed pages from a civil passport. When copying, place two spreads per sheet.
Step 4: buy insurance
To travel to any of the Schengen countries, you need to buy insurance with coverage from 30 thousand euros. The period of validity of the policy must necessarily cover the duration of your trip. An insurance policy can be purchased online in advance on the services of Cherekhap or SravnRu, as well as at the visa center, but there it is more expensive.
Step 5: Get help from work
Confirm your intention to return home! Take a certificate indicating the position, date of enrollment and vacation time. A certificate with the seal and signatures of the responsible persons is valid for 2 weeks.
School pupils and students need a stamped certificate from the educational institution, which is signed by its head - the school director or dean. Pensioners attach a copy of the pension certificate, and the owners of individual entrepreneurs - a copy of the TIN, a certificate of registration of an individual enterprise and its tax registration.
Step 6: Get a bank statement
It is important to show that you are financially secure. A certificate from a bank with a "wet" seal, which shows the account movement for the last 3 months, will do. Please note that such a document is valid for one month.
The embassy will accept copies of your bank cards and checks from ATMs showing the balance. Non-working, students and retirees need to attach a sponsorship letter from the person who gives him money for the trip, and a certificate from his place of work.
How much funds should be in the account? According to tourists, the minimum is 34 euros for each day of the planned trip.
Alena: "The documents included a certificate from the university, insurance, a sponsorship letter from my stepfather, and they did not accept documents on kinship, a certificate from his salary and a bank statement."
Step 7: Take a photo
Attach to the package of documents two color photos on a white or light background 45 mm by 35 mm. The portrait is taken from the top of the head to the top of the shoulders, with a neutral facial expression, no headgear, headphones or glasses.
Requirements for photography are on the website. Take a picture in advance or in the photo booth of the visa center, 6 photos cost 360 rubles.

Step 8: fill out the form
The visa application form can be filled out online, and then printed and returned with a package of documents. For a fee, your application will be completed by an employee of the Visa Application Center.
If you fill out the document yourself, enter the data in Latin in strict accordance with the documents. Take notes on your computer or with a blue pen.
In paragraph 6 about the place and country of birth, if the USSR is indicated in the passport, write USSR. In paragraph 19, about the occupation, individual entrepreneurs need to write INDIVIDUAL ENTREPRENEUR, pensioners - RETIRED, unemployed - UNEMPLOYED, and housewives - HOUSEWIFE.

Step 9: make an appointment
The Embassy of the Netherlands in Moscow is located next to the Arbatskaya metro station, at Kalashny lane, 6. Documents are accepted by appointment on weekdays from 9:00 to 12:30. Ready passports are issued from 15:00 to 16:00. Make an appointment at the embassy website.
In St. Petersburg, the Consulate General holds a reception at Moika Embankment, 11. There are three more consular departments in Kaliningrad, Yuzhno-Sakhalinsk and Murmansk.
It is convenient to apply for a Dutch visa in Moscow at the visa center, which is located at 3 Kashirskoye highway, bldg. 2, p. 9. Applications are accepted on weekdays from 9:00 to 16:00. Those who come without an appointment are served from 12:00 to 13:00. The recording is done on the website.
The Visa Application Center in St. Petersburg operates on the territory of the Chkalovsky business center, at 16/7 Bolshaya Raznochinskaya Street. Documents for a visa to the Netherlands are accepted without an appointment. Accredited visa centers are also open in other large cities of Russia. Check out the list of Visa Application Centers.

Step 10: Submit documents and biometrics
Since 2015, everyone who wants to have a Schengen visa has been fingerprinted. Even if you have done this before, come to the visa center in advance - half an hour before the specified time - and go through the fingerprinting procedure. Children under 12 are exempt from biometrics.
When everything is ready, give the documents to the employee and receive a receipt.
Olga Zagorskaya: "We were given a ticket, and the number immediately lit up on the board. Since I had two absolutely complete sets of documents, it took 15 minutes to submit them."
The cost of a visa to the Netherlands is fixed. For a regular visa you need to pay 35 euros, and for an express visa - 70 euros. At the visa center they charge a service fee of 1900 rubles. You can order photocopying at 35 rubles per sheet, filling out a questionnaire - 400 rubles, SMS notification of passport readiness - 150 rubles and other services. Payment is accepted at visa centers in rubles.
Step 11: Get your visa
The Embassy of the Netherlands considers documents for 4 days, but the decision can take up to 10 days or more. We advise you to submit your documents at least 15 days before the start of the trip.
You can find out about the status of your passport online by the registered application number, by e-mail. The e-mail address is protected from spambots. Javascript must be enabled in your browser to view the address. or by phone +7 (499) 709 83 38 and +7 (499) 703 36 75. Ready passports are issued in the same place where you submitted your application. Visa Application Centers offer courier delivery service.

Netherlands visa refusals
Holland is one of the most difficult countries to apply for a Schengen visa. 2.9% of applicants refuse - 4th place in the European Union. The refusal is informed by an official letter.
Reasons for refusing a visa to the Netherlands:
- incomplete package of documents;
- discrepancies in information in certificates and questionnaire;
- flight booking has not been confirmed;
- low income;
- suspicion of immigration intent;
- migration, administrative and criminal violations in the past.
If you have been stamped 3C, correct mistakes in documents and report missing papers. The 2C stamp means that you are called for an interview, and 1C means that you have received a visa rejection.
If in the first two cases it is relatively easy to eliminate the shortcomings, then the refusal of the 1C visa officer is allowed to be appealed only by an official appeal to the ambassador. As a rule, the decision is extended for 2 months, and the refusal is repeated. The period of "visa quarantine" can be up to 5 years.


